How to deploy Azure Policy - The DevOps way (part two)
Welcome back on the second part of “How to deploy Azure Policy - The DevOps way”! If you’ve followed along, great! You are going to expand further on the project. You will be creating a DevOps pipeline step-by-step by leveraging YAML templates. When you’ve setup the build stage, you are going to make sure the effect the policy is applying, has been tested before bringing it into production. Seatbelt on, you are going through a lot of code!

- Gijs ReijnCloud Engineer
A quick summary what has been done so far in the first part:
- The project structure has been created for future growth
- EPAC has extracted an existing Azure Policy for management
- Basic validation has been added to validate .JSON
Setup DevOps pipeline to deploy Azure Policy
While there are plenty of CI/CD tools around there, you are going to setup a DevOps pipeline in Azure Pipelines. As mentioned in previous part, everything up until now is scripted. In such way, you can simple wrap around those scripts in built-in tasks from Azure Pipelines. Examples speak for themselves, so let’s get it moving.
- Run the following script in the root to create the pipeline templates and variables that will be responsible for building EPAC
2. In steps-build.yml, add the Build-DeploymentPlans cmdlet and save it
3. In the steps-definitionfolder.yml, determine the definition root folder as per the structure.
4. In file steps-requiredmodules.yml, you add the required PowerShell modules EPAC needs to run.
5. Stitch everything together in jobs-build.yml
If you are using a private pool, you can change it around by setting a default in the poolName parameter and keep the vmImage empty
6. Wrap around in the stages-policies.yml to include the job to run
7. The naming.yml is the DevOps pipeline to build EPAC through Azure Pipelines. Add the following content to include the stage template
In the pipelineVariables folder, populate the required variables to deploy against your Azure Subscription through the Service Connection. The Service Connection used, should have the appropriate permissions to create Azure Policy.
Before moving on, there was a lot of coding going on. First off, you started by creating the build steps required to build the policy plan. As you can see, there is a new parameter introduced. The -DevOpsType switch has been specified, which internally sets the following variables underneath.
These two variables are checked based on the condition if there are changes in your environment. The definitions folder step is responsible for determining which sources needs to be picked up. With this method, you can build your pipelines for each type you introduce. As you’ll see later when creating the pipeline, it’s required to set the naming convention on your pipelines. Installing the required modules steps speaks for itself.
In the job YAML file, you add the steps to run. You can specify the parameter environment for the environment you want to target. That comes back in the stages, where you can introduce each stage. In the above example, you’re first targeting your sandbox environment.
You can now create the DevOps pipeline in Azure Pipelines.
If the policy objects did not exist in your environment, it will show you through the pipeline that there are changes.

The first part has now been setup. It’s time to expand our testing framework and validate our Azure Policy.
Adding Quality Assurance tests for validating effect
You’ve introduced some basic testing already into the project. Those tests don’t actually test out the “effect” of the Azure Policy that gets assigned. Before you deploy your policy objects to higher environments, it would be nice if you can actually test out the effect of the change. Introduce Quality Assurance testing, where you apply the policy, and test if it meets the standards you thought of so hard.
The policy that was created in the first part, checks if Resource Groups are created with the appropriate naming convention. When trying to create a Resource Group that is invalid, it should throw an error.

Figure 2: Invalid resource group
With the information at hand, you can start by building a simple test to validate multiple scenarios.
- Create folder QA under tests folder
- Introduce a new file called Naming.tests.ps1
- Add the following content to validate multiple scenarios based on the Azure Policy Definition
You can re-use the Invoke-PesterWrapper.ps1 script and execute the tests to see if they succeed.

Figure 3: Execute Quality Assurance tests
Sweet, as you can see both rg-marketing-dev and rg-marketing-prd are created. When inserting an invalid Resource Group name, it is disallowed by the policy.
It’s time to add the tests into the pipeline and publish back the results.
- Create steps-test.yml in the pipelineTemplates folder
- Add the following to load the wrapper script, and execute the tests based on the stage names
3. Create the steps-publishResults.yml file to publish back the results to Azure Pipelines
4. Add both steps into jobs-test.yml
5. Include the job in the stages-policies.yml
Fantastic, probably the pipeline has been triggered, but where is the Quality Assurance test?
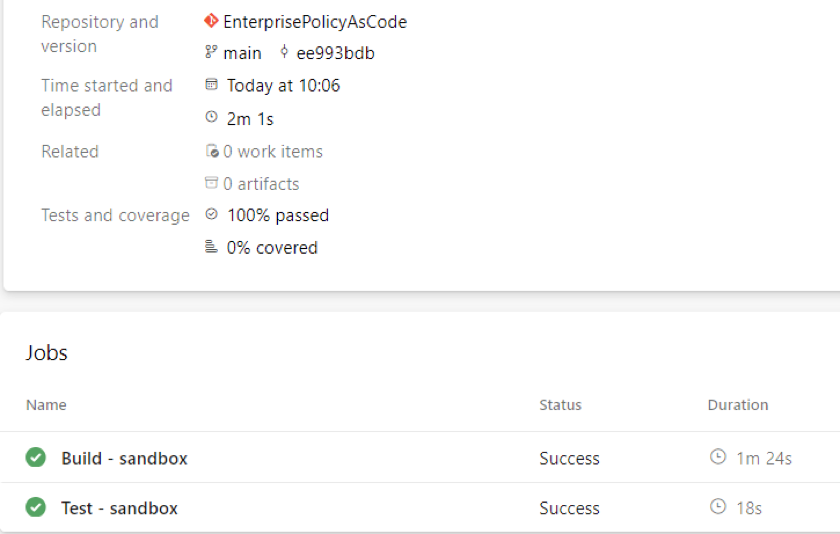
Figure 4: Added test job in the pipeline
You saw in the test step task, that it runs based on certain conditions. In this case, it runs only if there is a “QA” stage. With this method, you can add a separate stage before you actually deploy your changes into production. Before you do so, let’s add the deploy stage for the sandbox environment.
Deploy Azure Policy through DevOps pipeline
By now, you should know that you can deploy the policy plan EPAC creates with the Deploy-PolicyPlan cmdlet. You can re-use the same methods as you’ve been doing so far, to target the specific environment from the configuration file.
- Create steps-deploy.yml in the pipelineTemplates folder to deploy the policy plan
2. Create the jobs-deploy.yml file, add the following to create a dependency on the test stage on Sandbox and deploy the policy plan step
3. Add the jobs-deploy.yml to stages-policies.yml after the test job
When you want to validate if the deployment goes through the pipeline, you need to remove one of the objects in your Subscription. Else you will be presented with the condition.

Figure 5: Condition does not meet as there are no chances
Let’s wrap it up by adding the Quality Assurance stage to see if it runs.
Quality Assurance test through pipeline
It’s actually pretty easy to add the Quality Assurance stage, as you’re heavily using templates to define the pipeline logic. But the pudding is in the naming of the stages. Check it out.
- Introduce the following stage in stages-policies.yml
2. Create a new file epac-qa.yml in the pipelineVariables folder to target the Service connection
Now when the changes are in, trigger the pipeline and see the difference.

Figure 6: Quality Assurance test executed through pipeline
It’s in the details of the scripts. As it sees that the StageName is now QA, it will execute the tests accordingly. Well done!
Conclusion
You have been working up until now on your sandbox environment. Your whole pipeline is created by using templates. Those templates can be re-used by introducing multiple stages. Depending on the environment you’re working in, it is simply adding the EPAC selector and stage you need. If you even take it a step further, you can create branches and set the conditions when certain stages have to run.
Hope you’ve learned a ton! There is definitely more to explore in Enterprise Azure Policy as Code. Head-over to their awesome documentation if you want to learn more topics.