How to deploy Azure policy: The DevOps way
In this first part of this series of blogs, you will delve into deploying Azure Policy the “DevOps way”. You’ll start by exploring the Enterprise Azure Policy as Code (also known as EPAC) tool and set up the project structure for future growth. Later, you’ll create an Azure Policy that follows the naming convention on Resource Groups. The result can then be exported to your project and managed by EPAC. The last section will cover basic validation of the files produced by EPAC.
Hang on tight, you’re going to cover a lot of ground and see a ton of coding examples. Let’s get it started.

- Gijs ReijnCloud Engineer
Azure Policy, a feature in Azure that enforces organizational standards and assesses compliance. Many large organizations implement Azure Policy from top-level management groups.
Every large enterprise has an organizational chart. Wether they call it a division, domain, department, or anything else on the matter, it will probably reflect back in the management groups created in Azure. For example, take a look at the following image when management groups became generally available:
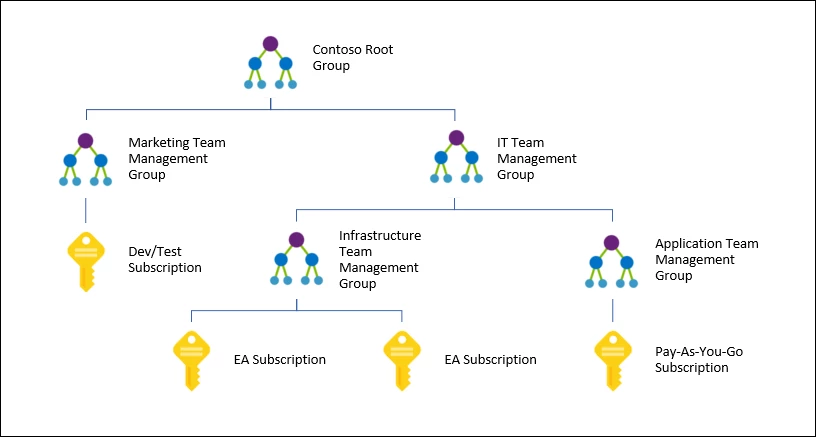
Rabobank follows the same principle, but of course with a different organizational hierarchy in Azure. Each domain gets one or two subscriptions to deploy its Azure resources. Subscriptions are provided by a large team of Platform Engineers, which also enforce the Azure Policies from the top-level Management Groups.
The question then becomes, can teams within the domain still leverage Azure Policy to enforce their domain standards? Glad you asked! Azure Policy is not limited to Management Groups. You can scope Azure Policy on Subscription-level.
Getting started
Before diving into the nitty-gritty things of Azure Policy, you need to make sure you have the following in-place:
- An Azure DevOps Services account
- At least one (preferable two) Azure Subscription available
- PowerShell v7 or above, in this series, v7.3.8 is used
- The Az PowerShell module, preferably 9.3+ or above.
- Pester PowerShell module, in this series v5.5.0 is used
Enterprise Azure Policy as Code
You might already have seen the term being flipped, Enterprise (Azure) Policy as Code (also known as EPAC). Policy as Code is used to define and manage your Azure Policies as Code. Azure Policies are written in JSON format and can be extracted also in such way. Still, you need a tool that can integrate CI/CD capabilities to deploy your Policies, Initiatives (or Policy Sets), Assignments (Policy or Role), and Exemptions. That’s where Microsoft has developed in partnership with S&C4CI, a PowerShell module called EnterprisePolicyAsCode.
To install the PowerShell module, use the following cmdlet:
If you're using still using PowerShellGet v2, use the Install-Module cmdlet
Following the installation of the PowerShell module, set up the basic project layout structure that will hold your policy objects.
When it's finished, some subfolders were created, including a configuration file.
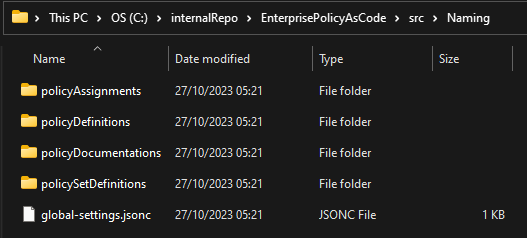
The subfolder structure speaks quite for itself. The configuration file that has been created needs to be modified according to your environment. Replace the sections in the example below.
It’s a fair question to ask why not store all policies objects in the src folder, especially if you’re aware of how the public azure-policy repository looks like? Both approaches have their pros and limitations. When managing all your policy objects in big chunks, it’s difficult to integrate it into a DevOps pipeline. It also doesn’t allow you to test each Policy Set definition separately, as you’ll learn later.
You now have set up your project structure. Now you need a policy to work with. Let’s start by creating your own naming convention policy in the sandbox environment.
Create naming convention policy for Azure resources
Microsoft has already provided a ton of details on naming recommendations. Unthinkingly you can adopt these naming recommendations, but you can also throw in your own sauce over it. Take for example the naming pattern for a Resource Group:
rg-<department>-<application>-<environment>
This will end up in something like:
- rg-marketing-application-dev
- rg-marketing-application-prd
Knowing this information at hand allows you to create the required policy for it.
- Open the Azure Portal
- Search for Policy in the search box
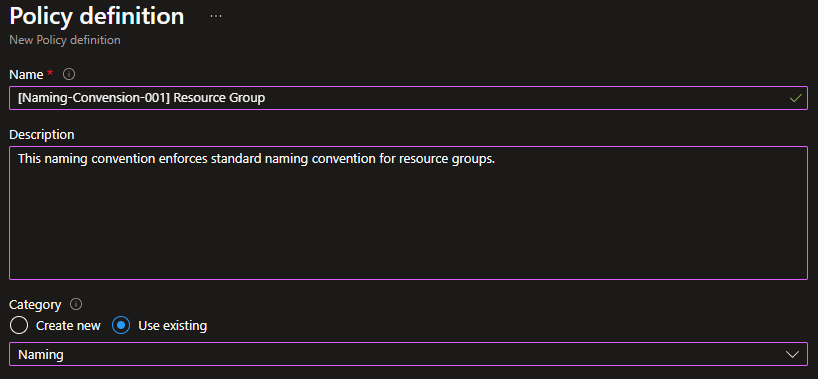
- Click on Definitions in the Authoring section -> + Policy definition
- Select Subscription in Definition location
- Create a meaningful name, in this example [Naming-Convension-001] Resource Group is used
- Add the description and use the existing category Naming
- In the editor field, add the following content
8. Press Save to save the Policy Definition in Azure
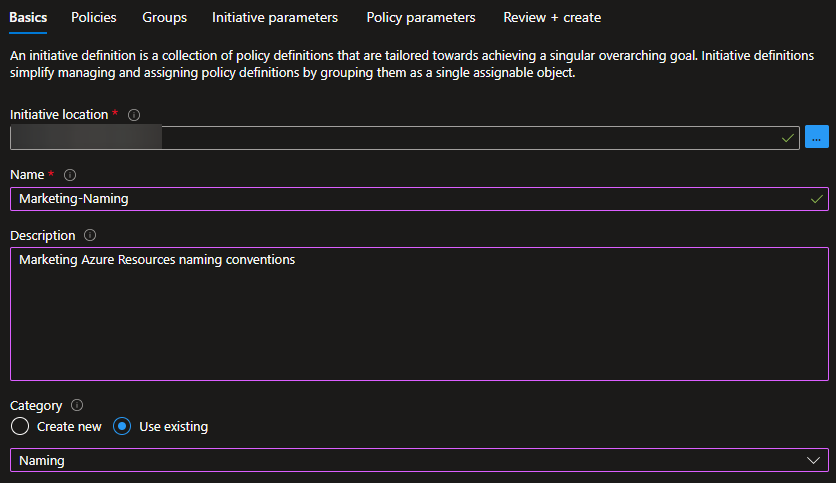
You can now create an initiative definition that holds the collection of Policy Definitions. For the sake of the series, you’ll be working with only one Policy Definition. If you already have many Definitions that are tailored around in achieving the same goal, in this case naming conventions, you can add them to the Initiative definition.
- Back in the Authoring > Definitions > Click Initiative definition
- Select the same Subscription in previous step
- Add the following content
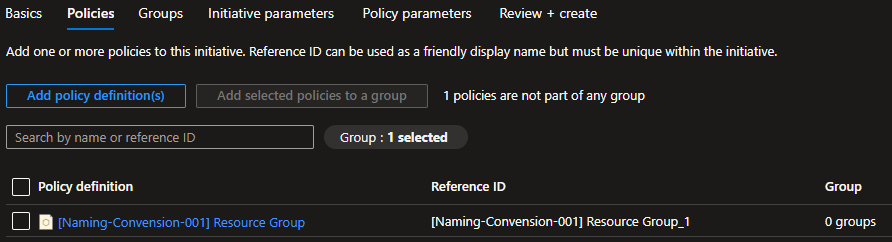
4. In the Policies section, make sure you add the Policy Definition
5. Map the initiative parameter in Policy parameters
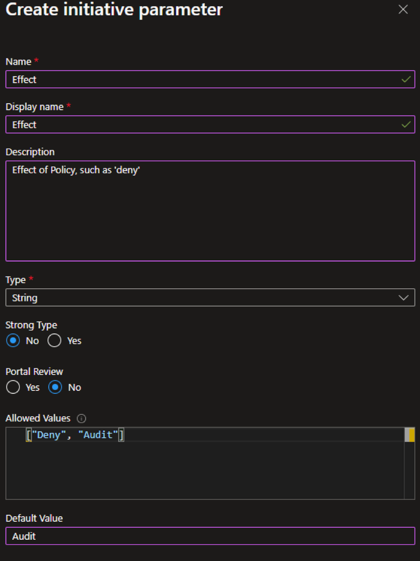
6. Map the initiative parameter in Policy parameters

When you map parameters in your Initiative definition, it provides you with the ability to set different values across your subscriptions. For example, on your development subscription, it might not be needed to follow a strict naming convention, whereas for production it does.
You can now create and assign the Initiative definition to apply your Azure Policy.
Managing Azure Policy through EPAC
It’s now time to extract the policy and utilize EPAC to handle Azure Policy deployments through your environments. To extract the policy that you just created, use the following cmdlet.
This will extract the policy that was created through the Portal, and output everything in JSON format.
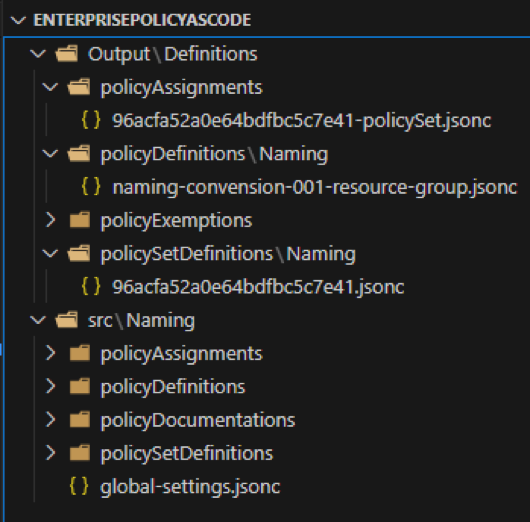
From here onwards, you can copy the output files into the appropriate folders and let EPAC build a plan for policy deployment. This plan can be deployed for each environment it gets created from. That’s where the pacEnvironment value comes into play in the global-settings.jsonc file.
To test out the process, remove the Policy Definition, Initiative Definition, and Initiative Assignment.
Give it a minute to finish cleaning up. If everything has been removed, run the following to generate a plan for deployment.
As you’ll notice in the output, EPAC has detected 3 new changes in your environment.
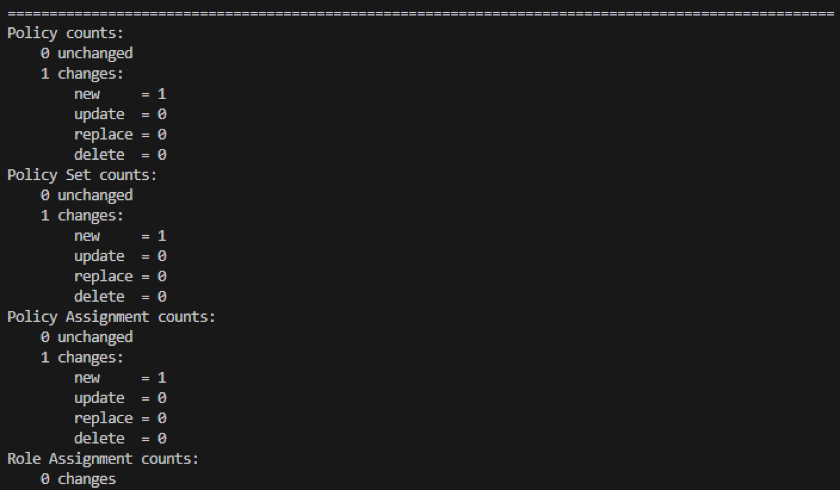
Fire up the Deploy-PolicyPlan cmdlet to let EPAC manage your policy objects.
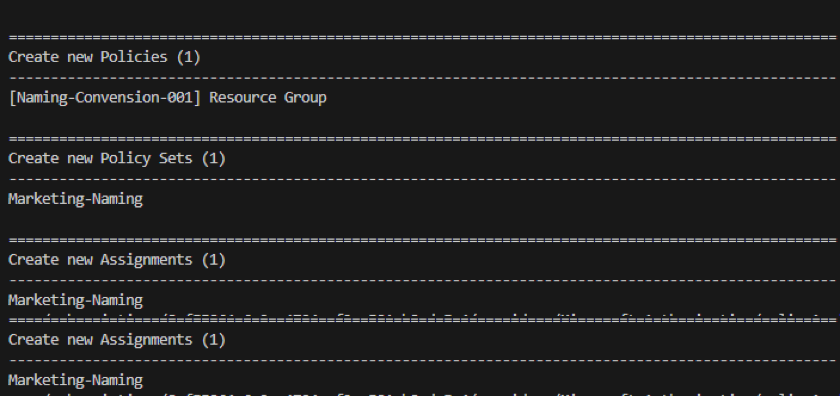
If you check in the Azure Portal, the policy objects have been deployed by EPAC. Fantastic!
Basic validation testing on policy objects
Before closing the first part of this series, it’s important to implement some basic validation testing on policy objects. As you’ve learned to extract existing policies from Azure, it’s also possible to manually create them. EPAC supports a $schema tag on JSON files introduced in your repository.
This allows the flexibility to develop either through your favorite editor, or extract existing policies created through the Azure Portal. Nevertheless, the method you choose, validating the JSON files that have been created, including their structure, is useful. It’s useful to validate the JSON files that you create and their structure. To do so, you can leverage Pester, the testing framework for PowerShell.
- Open the PowerShell terminal
- Run the following cmdlets in sequence
3. Open the FileContent.Tests.ps1 file and add the content below to test if the JSON is valid
4. Open PolicyAssignmentStructure.tests.ps1 and add the following to check if the scope count has been set
5. Open _PolicyDefinitionStructure.tests.ps1 and add the following to check if the property elements are correctly set
6. Lastly, do the same for PolicySetDefinitionStructure.tests.ps1
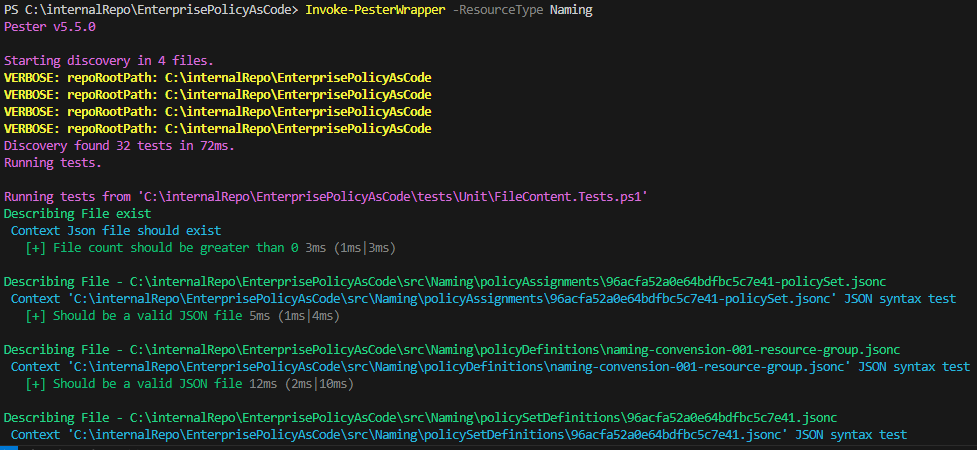
To execute the unit tests, you would run the Invoke-Pester cmdlet. As you’re building the project to contain multiple resource types, it would be useful to test each type separately. That’s why in the above snippets, the -ResourceType parameter can be passed in.
7. Open the Invoke-PesterWrapper.ps1 and add the content shown below to wrap Pester around configuration that can be parsed when calling the function.
To invoke the tests, you can dot-source the script. When it’s loaded, call Invoke-PesterWrapper -ResourceType Naming from the root of your repository.
Conclusion
You’ve now managed to set up the basic project structure for your Azure Policies. You’ve had your first glimpse at Enterprise Azure Policy as Code and used it to extract policy objects. These policy objects can now be managed by EPAC. EPAC creates a plan and deploys it throughout your environment. As everything is driven by cmdlets and scripts, you will be able to integrate it in a CICD system later. In the last section, you were introduced to the first basic validation on the policy objects by using Pester.
That’s it for the first part. There’s more to come in the next part!
References